 Even if you’re not currently using Facebook to actively promote your business right now, it’s still a good idea to have a respectable-looking presence on Facebook.
Mainly for optics.
Because people do check you out online. And a Facebook business page gives your business “legitimacy”.
Don’t worry, your Facebook business page doesn’t have to be perfect. It just has to be good enough.
Let’s get busy.
NOTE: To avoid any confusion, it’s important to know there are 2 types of “pages” you can create on Facebook — one for personal, one for business:
- A Facebook Profile = PERSONAL
- A Facebook Page (aka Facebook Business Page, aka Facebook Fan Page) = BUSINESS
Here are the steps for creating a Facebook Page for your business:
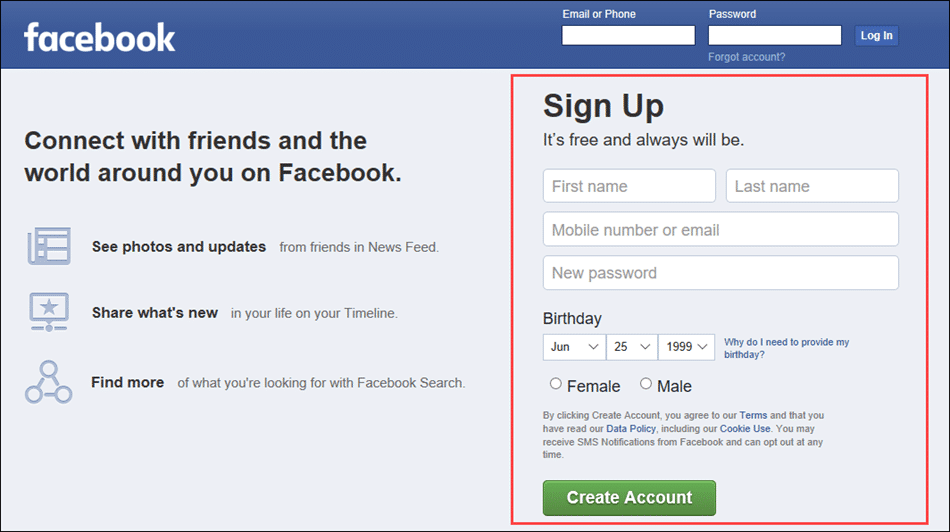
- Create Facebook Profile. Before you can create a Facebook Page for your business, you’ll need to create a personal account on Facebook. If you already have a personal Facebook account, proceed to step 2. If you do not have a personal account on Facebook, just go to Facebook.com and sign up for one.
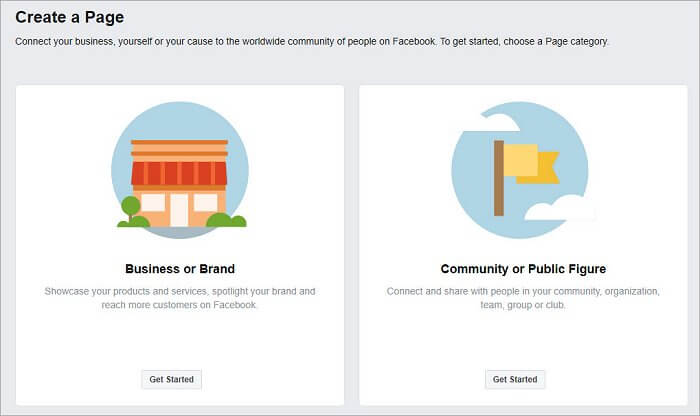
- Create Facebook Page. Once you’re logged into your personal Facebook account, click here to create a Facebook Page for your business. You’ll see this page:
- Choose Category. Pretty self-explanatory. If you’re a business, obviously choose “Business or Brand“. If your business changes or evolves, you can always change your category later.
- Add Company Details. After you select your category, just follow the Facebook wizard to fill in your company details. Don’t agonize over this because you can always modify things later. Just do the best you can for now and get ‘er done.
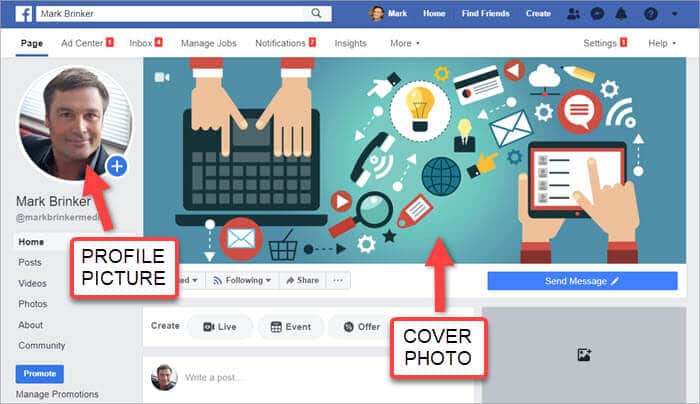
- Upload Profile Picture. Either a headshot of you or your business logo, whichever seems most appropriate. The official Facebook dimensions are 170 x 170 pixels, so make sure your profile picture is at least this big.
If you don’t have a profile picture ready yet, just click “Skip” … and you can add it later. - Edit Page Settings. Some people choose to keep their Facebook Page private until they’re ready to publish it. Personally, I wouldn’t worry about that right now since you’re not actively promoting your Facebook Page and few (if any) are going to see it right now — and if they do, so what? But if you’d like to keep your page private until you’re ready to publish it, just go to Settings, then Page Visibility as shown below:
- Create A Cover Photo. Official dimensions are 820 x 312 pixels. Visit a few of your competitors’ Facebook pages to get ideas of what might work and what looks good. (Caution: There are some less-than-stellar cover photos out there, so be prepared to dig a little to find some good ones.) To create your cover photo, you can use a free tool like Canva if you have the time and some basic graphic design skills. But if you don’t want to mess with this yourself or you’d like a really tricked out cover photo, just pay a graphic designer a few bucks to do this for you. If you don’t have a cover photo ready yet, just click “Skip” … and you can add it later.
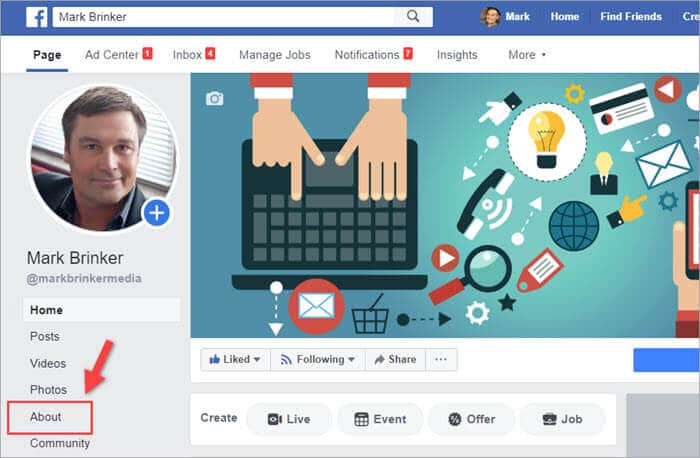
- Update Your About Information.
Time permitting, fill out as many fields as you can in Facebook’s About section. More details usually translate to higher trust and credibility. - YOU’RE DONE!
Right now, don’t worry about what to post on Facebook or setting up a Facebook ad campaign. The goal right now is to just get your Facebook Page published and get you in the game.
Granting Access To Your Facebook Account
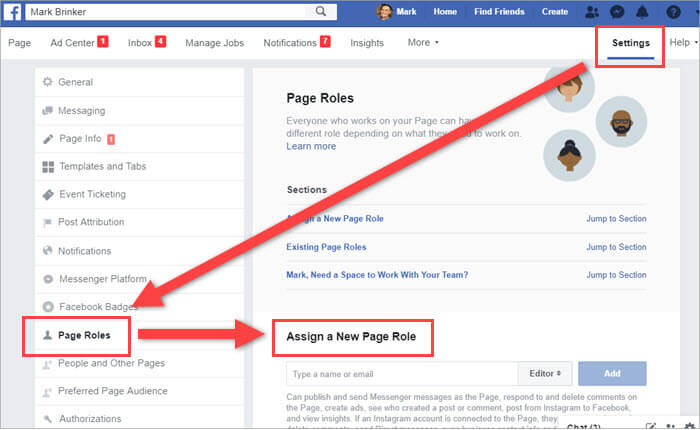
If someone is going to help you manage your Facebook Page, you’ll need to give them access to your Facebook Page. Here’s how to do that … go to Settings >> Page Roles >> Assign A New Page Role, as shown below:
Type in the name of person you want to have access to your Facebook Page (they need to be on Facebook) and click “Add”. You’ll then need to specify their level of access by assigning them a role. For a detailed explanation of different Page roles and what they can do click here.
A few thoughts on Facebook Page roles:
- By default, you are assigned the role of Admin, which means you have complete and total access to everything on your Page.
- It’s a good idea to assign a trusted friend or family member as an Admin in case you have a serious illness or accident (or die) so someone can access your page — kind of like having an emergency contact.
- For security purposes, assign team members or marketing consultants a Page role of Editor or lower (i.e. not Admin) so they don’t have full access and complete control over your Facebook Page.
Additional Resources
If you’d like more granular, detailed information on setting up your Facebook Page here are 2 great resources:
How to Set Up a Facebook Page for Business
How to Create the Perfect Facebook Page for Your Business: The Complete A to Z Guide


It is an amazing post and you explained it in a detailed way. Nice to see this here. I will bookmark your blog for more details. Keep sharing new things like this.